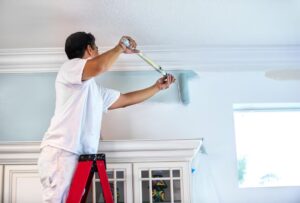
Paint fails from the bottom up. A finish that peels within a couple of seasons usually was not the problem. The surface underneath it was. Painting contractors across the Hudson Valley make the same point in different words: preparation is the job, and color is simply the last step. According to Dan Lawson of Medallion Paint, ninety-five percent of good painting is having a good surface. That one idea explains why two houses painted the same weekend with the same product can look completely different two years later.
For homeowners in Hudson, New York, prep has an extra dimension. The housing stock is old, the seasons swing hard, and moisture works its way into trim, sills, and siding long before anyone notices a problem from the street. What follows is a practical order of operations for getting a house ready for exterior paint, based on the prep processes painting contractors in the region describe.
Why Preparation Decides How the Paint Job Ages
Putting a product on a surface does not require much skill or training. That is the blunt framing one Hudson Valley painting company uses before explaining why the work still matters. Anyone can spread paint. Far fewer people can make it stay.
Adhesion is what you are really buying when you pay for preparation. Paint needs a clean, sound, dry surface to bond to. Dirt, mildew, chalky oxidation, and old failing coatings all sit between the new paint and the substrate. Where adhesion fails, moisture gets in, and once moisture is behind a film of paint, peeling follows. The prep phase is not the slow part before the real work. It is the part that determines whether the real work lasts.
Start With an Inspection of Every Exterior Surface
Before a hose or a scraper comes out, walk the house and look closely at what is there. The inspection the trade describes is specific and unglamorous: check for rot, loose boards, popped nails, and splinters. Those four items tell you most of what you need to know about how much repair the job will require.
- Siding: look for loose or cupped boards, soft spots, and sections that have pulled away from the wall.
- Trim: check the bottom edges of fascia, rake boards, and window trim, where water sits longest.
- Window sills and door frames: probe for soft wood and look for cracked or missing caulk lines.
- Nail heads: popped nails signal movement, and they leave a gap for water once the head is exposed.
- Rotten wood: anything soft, crumbly, or dark needs attention before paint, not a coating over the top of it.
Write down what you find. A written punch list keeps the repair phase honest and makes it easier to compare quotes, because you can ask each painter how they plan to handle the same specific problems.
Cleaning Is the Step Most Homeowners Cut Short
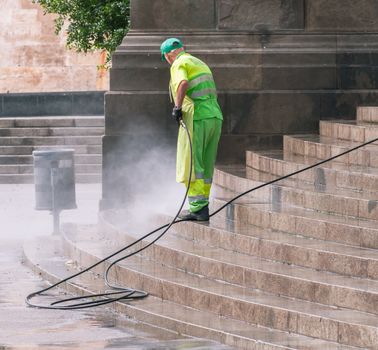
The goal of washing an exterior is to remove dirt, mildew, old stain, and gray oxidation. Gray, chalky wood is a common sight on older Hudson Valley homes, and it signals that the surface has weathered to the point where it will not hold paint well without attention.
Contractors in the region handle this with pressure washing and soft washing, and the distinction matters. Soft washing relies on lower pressure and cleaning solutions to lift mildew and organic growth without driving water into siding joints or damaging soft wood. High pressure aimed at the wrong surface causes damage that has to be repaired before painting can continue.
Once the exterior is completely washed and clean, it has to dry. Primer and paint applied over a damp surface trap moisture, and trapped moisture is what makes a new paint job blister. Give the house time, especially on shaded elevations and the north side, where drying takes longest.
Scraping, Sanding, and Patching the Surface
After washing, the surface gets inspected a second time. This pass is where loose paint chips and rotten wood show up clearly, because washing removed the dirt that was hiding them. The prep process at this stage involves scraping, sanding, patching, puttying, caulking, and priming.
- Scrape loose and failing paint back to sound edges so the new coating has something to grip.
- Sand to feather the transition between bare wood and intact paint, and to dull a glossy surface.
- Patch and putty voids, gouges, and small holes so the finish reads flat.
- Caulk joints, seams, and gaps around trim, sills, and penetrations to keep water out.
Caulking is the step homeowners most often skip and the one that protects the most. Water that gets behind trim through an open seam will find wood, and wood that stays wet rots. A painter who caulks carefully is doing structural work, not cosmetic work.
Priming Before Any Color Goes On the Wall
Priming is not optional on bare wood, patched areas, or repairs. Contractors describe their process as cleaning, sanding, patching, caulking, and priming before any color goes on the wall, and the order is deliberate. Primer seals, bonds, and gives the finish coat a uniform surface to sit on.
Spot priming repaired areas is the minimum. On a house with a lot of bare wood or a significant color change, a full primer coat is worth discussing with whoever is doing the work. The right primer depends on the substrate and the topcoat, so follow the product manufacturer’s recommendations rather than a generic rule.
The Preparation Sequence at a Glance
| Stage | What Happens | Why It Matters |
|---|---|---|
| Inspection | Check for rot, loose boards, popped nails, splinters | Identifies repairs before materials are ordered |
| Cleaning | Remove dirt, mildew, old stain, gray oxidation | Gives paint a surface it can bond to |
| Second inspection | Look for loose paint chips and rotten wood after washing | Catches what dirt was hiding |
| Scraping and sanding | Remove failing paint, feather edges, dull gloss | Creates a sound, even surface |
| Patching, puttying, caulking | Fill voids and seal joints | Keeps water out of trim and siding |
| Priming | Seal bare and repaired areas | Improves adhesion and finish uniformity |
| Painting | Apply finish coats | The visible result of everything above |
Older Hudson Homes and Lead-Based Paint
A large share of the housing around Hudson, NY 12534 predates modern paint formulations, and lead-based paint handling is a service category that Hudson Valley painting companies list separately for that reason. If your home is old, assume lead paint may be present until testing says otherwise.
Testing and handling requirements are regulated, and the rules are not something to guess at. Confirm what applies to your property with the appropriate state or local authority, and ask any contractor you interview how they handle lead paint in older homes. A crew that does not have a clear answer is a crew to pass on.
What to Ask Before You Hire a Painter
Reviews and ratings for exterior painters in Hudson, NY are widely available, and they are a reasonable starting filter. The next step is a conversation about process, because two bids for the same house can describe very different amounts of work.
- Walk me through your prep steps in order.
- How do you clean the exterior, and do you use pressure washing or soft washing?
- How do you handle rot, loose boards, and popped nails?
- Do you scrape, sand, patch, putty, and caulk, and is that included in the price?
- What gets primed, and with what product?
- How do you handle lead paint if it is present?
Vague answers about preparation are the clearest warning sign. A proposal that lists cleaning, sanding, patching, caulking, and priming line by line tells you the crew treats preparation as part of the job rather than an add-on.
Timing the Work to Hudson Valley Weather
Exterior paint needs a dry surface and temperatures within the range the coating is designed for. Read the manufacturer’s label for the product being used and plan around it. Humidity and overnight dew matter too, which is why painters in this region tend to start early and stop before evening moisture settles on fresh surfaces.
If structural repairs are part of the scope, such as replacing rotted siding or rebuilding a section of trim, it can make sense to bring in a contractor who handles those trades. River Tide Builders works on Hudson Valley homes and offers individual trade services including siding and roofing, which is useful when preparation uncovers damage that a painting crew should not be fixing.
Frequently Asked Questions
How long does exterior painting preparation take?
It depends on the size of the house and how much repair is needed. A well-kept home with sound siding moves quickly through washing and spot scraping. A house with rot, loose boards, and widespread peeling takes considerably longer, because repairs, patching, and caulking have to be finished and dry before primer goes on.
Do I have to pressure wash before painting?
You have to clean the exterior, which is a required step in every prep process contractors describe. Pressure washing is one method, and soft washing is another that uses lower pressure with cleaning solutions. The goal is the same: remove dirt, mildew, old stain, and gray oxidation so the new coating can bond.
Can I paint over peeling or chipped paint?
No, and this is where most short-lived paint jobs go wrong. Loose paint chips have to be scraped back to sound edges, then sanded and primed before finish coats go on. Painting over failing coatings simply gives the new layer something unstable to sit on, and it will fail along the same lines.
Do I need primer if the paint includes primer?
Bare wood, patched areas, and repairs should be primed with a product suited to that surface, regardless of what the topcoat claims. Primer seals and bonds. Follow the manufacturer’s recommendations for the specific substrate and finish product you are using, and ask your painter what they plan to prime.